Hey there, tech enthusiasts! If you're reading this, chances are you're looking for ways to access your Raspberry Pi remotely without breaking the bank. Well, you're in the right place! In this article, we'll dive deep into how you can achieve free remote login to Raspberry Pi and make the most out of this powerful little device. Whether you're a beginner or an advanced user, this guide has got you covered!
Imagine being able to control your Raspberry Pi from anywhere in the world, without needing expensive software or complicated setups. Sounds pretty cool, right? That's exactly what we're going to explore today. From setting up SSH to using cloud-based solutions, we'll walk you through every step of the process.
Before we dive into the nitty-gritty details, let's quickly understand why remote access is such a game-changer. Whether you're managing a home automation system, running a server, or simply troubleshooting your device, having the ability to log in remotely can save you tons of time and effort. So, let's get started!
Read also:Kirsten Too Sweet The Ultimate Guide To Her Life Career And Sweetest Moments
Why Free Remote Login to Raspberry Pi Matters
Remote access isn't just a convenience; it's a necessity in today's connected world. With a Raspberry Pi, you can set up servers, IoT devices, or even media centers. But what happens when you're not physically near your device? This is where free remote login comes into play.
One of the biggest advantages of Raspberry Pi is its affordability. Why spend extra money on premium remote access tools when you can do it all for free? By leveraging open-source tools and simple configurations, you can unlock the full potential of your Pi without burning a hole in your pocket.
Benefits of Free Remote Access
- Cost-Effective: No need to invest in expensive software or hardware.
- Flexibility: Access your Raspberry Pi from anywhere, anytime.
- Security: With the right setup, you can ensure your device remains safe and protected.
- Productivity: Save time by managing your projects remotely.
Now that you know why remote access is important, let's take a look at the tools and methods you can use to achieve it.
Setting Up SSH for Free Remote Login to Raspberry Pi
SSH (Secure Shell) is one of the most popular and secure ways to access your Raspberry Pi remotely. It's lightweight, easy to set up, and completely free. Let's break down the steps to get SSH up and running on your device.
Step 1: Enable SSH on Your Raspberry Pi
Enabling SSH on your Raspberry Pi is a breeze. Here's how you can do it:
- Power on your Raspberry Pi and log in.
- Open the terminal and type the following command:
sudo raspi-config. - Use the arrow keys to navigate to "Interfacing Options" and press Enter.
- Select "SSH" and enable it.
- That's it! SSH is now enabled on your device.
Step 2: Find Your Pi's IP Address
To connect to your Raspberry Pi remotely, you'll need its IP address. You can find it by typing the following command in the terminal:
Read also:Vlad And Niki Net Worth The Rise Of A Power Couple In Digital Marketing
hostname -I
This will display your Pi's local IP address. Keep this handy, as you'll need it for the next steps.
Step 3: Connect Using an SSH Client
Now that SSH is enabled and you have your Pi's IP address, it's time to connect remotely. Here's how:
- On your computer, open an SSH client like PuTTY (Windows) or Terminal (Mac/Linux).
- Type the following command:
ssh pi@YOUR_PI_IP_ADDRESS. - Enter your Raspberry Pi's password when prompted.
- You're now connected to your Pi remotely!
Overcoming Local Network Limitations
While SSH works great within your local network, what happens when you're outside your home? This is where port forwarding and cloud-based solutions come into play. Let's explore these options.
Port Forwarding: The DIY Approach
Port forwarding allows you to access your Raspberry Pi from the internet by mapping a port on your router to your Pi's local IP address. Here's how to set it up:
- Log in to your router's admin panel.
- Locate the port forwarding settings.
- Set up a rule to forward port 22 (default SSH port) to your Pi's local IP address.
- Save the changes and test the connection.
Keep in mind that port forwarding can expose your device to potential security risks. Make sure to use strong passwords and enable firewall protection.
Cloud-Based Solutions: Simplified Remote Access
If you're not comfortable with port forwarding, cloud-based solutions like ngrok or PageKite can simplify the process. These tools create a secure tunnel between your Pi and the internet, allowing you to access it remotely without modifying your router settings.
Here's how you can use ngrok:
- Download and install ngrok on your Raspberry Pi.
- Run the following command in the terminal:
ngrok tcp 22. - ngrok will generate a unique URL that you can use to connect to your Pi from anywhere.
Enhancing Security for Remote Access
Security should always be a top priority when setting up remote access. Here are a few tips to keep your Raspberry Pi safe:
- Use Strong Passwords: Avoid using default passwords like "raspberry". Create a strong, unique password for your Pi.
- Enable Two-Factor Authentication (2FA): Add an extra layer of security by enabling 2FA for SSH.
- Limit SSH Access: Restrict SSH access to specific IP addresses or users.
- Update Regularly: Keep your Pi's software and firmware up to date to protect against vulnerabilities.
Alternative Methods for Free Remote Login
While SSH is the most popular method, there are other ways to achieve remote access. Let's take a look at some alternatives:
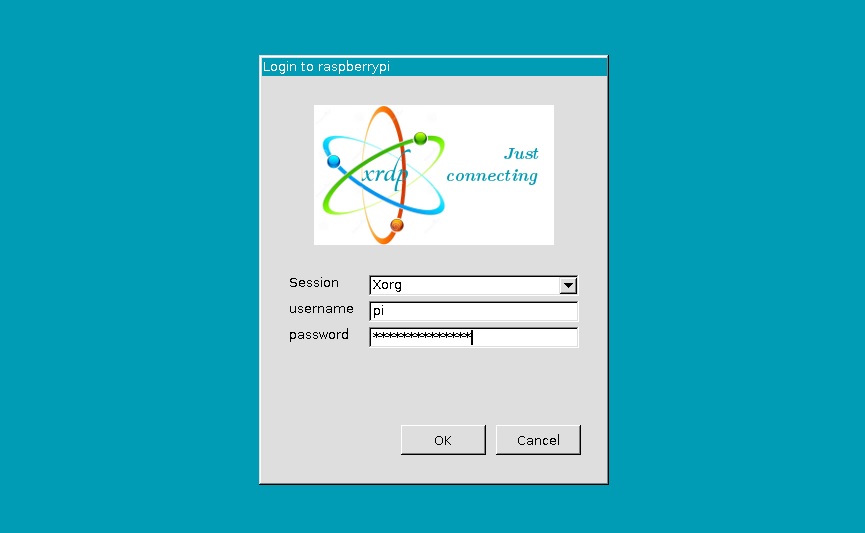
VNC (Virtual Network Computing)
VNC allows you to access your Raspberry Pi's graphical interface remotely. It's perfect for tasks that require a GUI. To set up VNC:
- Install the VNC server on your Raspberry Pi:
sudo apt-get install realvnc-vnc-server. - Enable VNC in the Raspberry Pi Configuration settings.
- Download a VNC client on your computer and connect to your Pi's IP address.
TeamViewer
TeamViewer is another popular tool for remote access. It's user-friendly and works across multiple platforms. To use TeamViewer:
- Install TeamViewer on your Raspberry Pi:
sudo apt-get install teamviewer. - Create a TeamViewer account and log in on both your Pi and computer.
- Connect to your Pi using the provided ID and password.
Common Issues and Troubleshooting
Even with the best setup, you might encounter some issues. Here are a few common problems and their solutions:
- Can't Connect to SSH: Double-check your Pi's IP address and ensure SSH is enabled.
- Port Forwarding Not Working: Verify your router's settings and ensure no firewalls are blocking the connection.
- Slow Connection: Optimize your network settings and use a wired connection if possible.
Real-World Applications of Free Remote Login
Now that you know how to set up remote access, let's explore some practical applications:
- Home Automation: Control smart home devices from anywhere.
- File Sharing: Access files stored on your Raspberry Pi remotely.
- Web Hosting: Manage your personal website or server without needing physical access.
Conclusion
In conclusion, free remote login to Raspberry Pi is a powerful tool that can enhance your productivity and flexibility. By leveraging SSH, VNC, or cloud-based solutions, you can access your device from anywhere in the world. Remember to prioritize security and regularly update your Pi to ensure a safe and reliable connection.
So, what are you waiting for? Start exploring the possibilities of remote access today! Don't forget to share your thoughts and experiences in the comments below. And if you found this article helpful, be sure to check out our other guides for more Raspberry Pi tips and tricks.
Table of Contents